Before we moved in, I designed an Elfa unit for several spaces including the mudroom. The Elfa unit wasn’t what I wanted for the mudroom permanently, but as with the master closet, it was a decently priced place holder. Or so I thought.
Because of the undefined status of the mudroom, over 3.5 years it became a place holder for everything. Every time we were having people over or the house keepers were coming – into the mud room went all the piles of things that hadn’t been dealt with or didn’t have a home. And there they stayed.
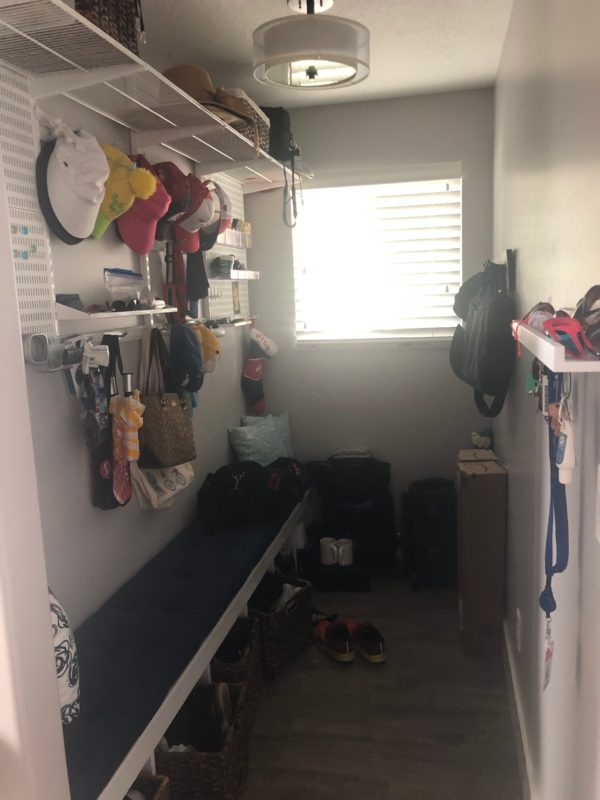
The strange thing about that plan was that the below photo is the mudroom as seen from the door of the guest bath. So all those people still saw right inside of our Monica’s Closet. Our plan was silly, but it was just about the most consistent thing we did with the mudroom.
I reached my limit with the mud room this past winter. I wasn’t willing to deal with the chaos that greeted me every single time I left or entered the house. So, I did what I always do: I grabbed one of my (five) tape measures, measured the whole space, and then I drew a plan with a pencil and some paper. And showed it to my MIL, who is married to my very handy FIL.

With a plan to make a better mudroom in mind, I set about making an even bigger mess of our house. First, I made a pile of all the things that needed to live in the mudroom. That included keys, shoes, hats, umbrellas, sunglasses, purse/briefcases, and running stuff.
Then we found homes (or got rid of) all of the things that could no longer take up space in the cramped little room. That included bowling bags (one of which wasn’t ours???) and windshield wiper blades that needed to be installed.
Then I set about researching all the best solutions for organizing the items that would stay in the mudroom. And looking at YouTube videos of handy people installing DIY wainscoting.
With my FIL on board (haha) with the plan and work he was volunteered to do, we piled into his truck and headed to Home Depot to buy the supplies:
- One quart of white paint (semi gloss)
- Two white 12ft 2x4s (I think they were MDF)
- Three white 36″ shelves
- Four wall hooks (purchased from Target in the early planning stages)
- One 12ft 2″x1″ wood strip (also, potentially MDF)
- A package of wall anchors and screws
- Six shelf brackets
- One tube of white caulk

In my pencil & paper rendering of the room, I decided the height of the wainscoting should be 42″ from the bench. This was mostly arbitrary but also it made sure that a seated person wouldn’t bonk their head against the hooks. My MIL helped me measure on the wall in several places, then we taped along those marks, and painted everything below the tape strip.

With the wood pieces installed, I used spackle to even out anything that wasn’t completely flush and fill in the nail holes. Once it was dry, I sanded it down, and then added a little more and sanded that down. Then I vacuumed up a disturbing amount of spackle dust.

I taped around everything and then applied two more coats of white paint. It looks really nice in this “before” paint photo, but what you can’t see are the gaping holes between the wood and the wall. Which was very discouraging at that stage! I had to keep reminding myself that there was still caulking to be done.

My FIL then caulked, installed the hooks, and put up the shelves. I probably could have done the shelves, but I’m very short and somehow can’t manage to get shelves level. The room looked like this until the following morning because I didn’t want any wet paint getting on the bench cushion.

This definitely does not always happen, but it looks exactly the way I imagined it would.
::Heart eyes::
The upper shelf holds things we don’t use every day, like a basket for umbrellas, and our gym bags. The baskets underneath the bench hold shoes and hats. We tend to kick off our shoes the moment we come in the door and I’ve learned it’s easier to roll with that urge than try to fight it.

The opposite wall took a little more planning and searching to get right. We needed it to be hard working, but also unobtrusive in the small space. We like to pin up mail and reminders, as well as have somewhere to put coupons to our favorite stores. We also needed a storage solution to keep our many pairs of sunglasses (how do we have so many pairs but can never find them??). But my most pressing issue was to have somewhere to store and CHARGE our running gadgets.
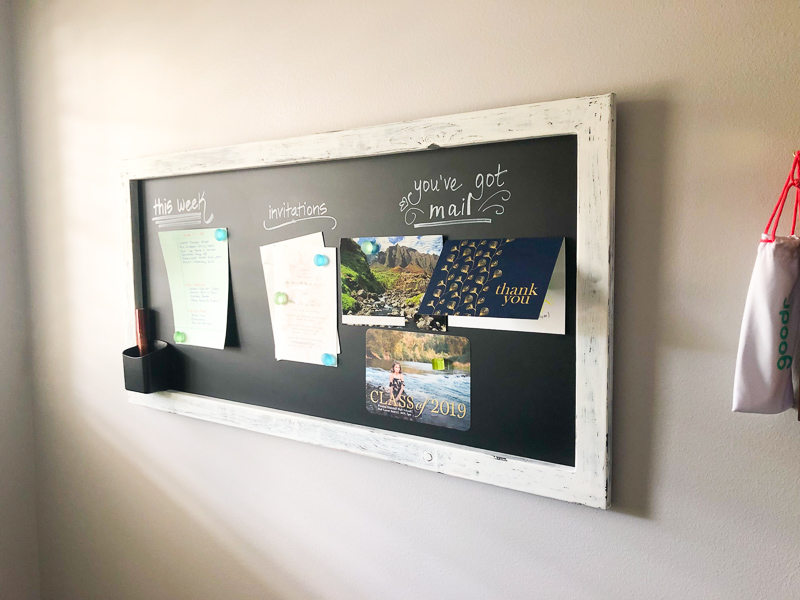
This Magnetic Chalkboard from Radical Woodworks was perfect to pin up mail, invitations, to-do lists, and coupons.

My favorite Etsy find was the wall mount sunglasses organizer from Masters of Fate. We had to whittle down our collection to 5 each (ok! ok! I clearly have 6 pairs). Now we always know where to find them and how perfect is it? I stuck some command hooks to the side to store our sunglass pouches.

The last segment, while not the most visually appealing, was exactly what we needed for the running gadgets. Our running watches and wireless headphones died during the week in our gym bags (or under the car seat, or in a pants pocket). And when they were charging up in the bedroom or on a desk or counter, we forgot to take them running with us. With an extension cord, some command hooks and caddies, our running gadgets are always where we need them.
I can’t tell you which area of the tiny mudroom I’m most excited about, because it changes every minute. I almost wish I’d taken the time to execute this before we moved in, because it was probably the easiest DIY project I’ve ever put off for 3.5 years.
But, as I keep learning, there are a lot of things we would have done differently at the beginning that we can now confidently make perfect for how we live in the house now.
On to the next organization project!

I love reading your blogs! Your give me so many ideas!
LikeLiked by 1 person
Looks Amazing!
LikeLike